Showing posts with label Cards. Show all posts

Thursday, 27 September 2012

July to September...


OK, I know it has been 3 months since I last posted, but like always you get busy and time flies. Throw in some illness and ta-da, here is the end of September! So I thought I'd give a brief overview of what I have been up to.

Firstly we went to New Zealand for a couple of weeks in July. New Zealand is a beautiful place and would love to go back, especially to Queenstown/Wanaka where the snowy mountains and skiing was fantastic.

I have been also very busy on the creative front, designing and making various things which I'll discuss in more detail in a later posts. There have been sightings of double rainbows, birthday celebrations and a trip to Melbourne thrown in for good measure (not to mention we couldn't resist the temptation and saw all the cute animals at Melbourne Zoo).

So basically that's where the last 3 months of my life has disappeared to and the speed that this year is going it will be Christmas before we know it! Eek!

Wednesday, 20 June 2012

Collection of Crafty Card Creations

We finally bought a new camera over the weekend and I am really looking forward to taking better photos, but first I have to learn how to use it properly :). While I'm doing that I thought I'd share with you some of my previous card creations I have made over the years. Seeing as it was my Mum's birthday a couple of weeks ago I thought I'd continue the theme with some more birthday cards I have made. I have made plenty of others but I'll save them for another time.

As you can see, some of these are rather detailed and they did take thought and time to make, but each and every one I enjoyed making and the reaction of the people who received them is even better! I have already shown a few cards I have made on here in previous posts which can be found here, here, here, here and here.

 Papercraft puppies

Watercolour daisy

Papercraft garden

 The card up the top was sketched from a photo in which I coloured with pencils (Derwent Studio and Derwent Artists) on black card and carefully cut out. The card below was a 3D caterpillar which unfolded (as shown) could stand by itself. This was a fun one to make although cutting the circles out was a little tiring on the hands with the scissors (if a hole punch that large existed, it would have made it easier).

 This was another fun one, I love using shiny silvery card and glitter, it makes the card pop!

 I love making character cards as they provide a challenge in getting all the details close, if not spot on with the real thing, but I only make them for those close to me, for obvious reasons. (Copyright infringements etc.)

This one is one of my favourites, classic Optimus Prime. Not only did I make this for my husband a few years back but I got to use up many card scraps I had around (I prefer not to waste any off cuts) and it came out great! And he got to relive some of his childhood memories upon receiving it :)

Wednesday, 13 June 2012

Mini Gromit


These are a few photos of a present I made for my mum's birthday. I finished it over a week ago but couldn't  publish any photos until after her birthday otherwise the surprise would have been ruined. I have been a huge Wallace and Gromit fan for years and I bought a big Gromit softie about 7-8 years ago. Mum has always eyed him off and when we moved to Adelaide she offered to "babysit" but my reply was sorry but he is coming with me :).

I thought the ideal present this year was to make her a Mini Gromit! Her reaction? She LOVED it! Mum said she had an inkling of what her present was when it arrived in the post and she couldn't resist the temptation and opened it up the night before her birthday, but I had no doubt that it was something she was going to love.

I didn't have a pattern to go off to make Mini Gromit, so he was basically a game of trial and error, I crocheted parts and tried my best to keep things in fair proportion. As you might notice in the second photo, Mini Gromit's face is a tad oddly sized, ideally his face should have been larger at the jaw and smaller at the brow but until you start stuffing it with fill, it is hard to really gauge what the finished product will look like. Some bits I had to start over as they looked totally out of whack, but I got there in the end. Having big Gromit sitting close by to look at helped a lot as I didn't need to keep referring to pictures on my DVD cases and books.


To go with Mini Gromit, I wanted to make an appropriate birthday card. So I decided to go with another favourite; Shaun the Sheep! This was a spin off from Wallace and Gromit and I love the animation in both! I created the card with Shaun and his little friend Timmy on the front. I really want to crochet a Timmy, Shaun or perhaps even both for myself sometime in the future, they are too cute.


The last photo is what I call my "family album" shot, every time I make a new softie I have to take I photo of it with my other ones before giving/sending the finished toy to its new home. Ducky (the first duckling I made, starred in my second ever blog post seen here), Lil' Robot and Froggy were my first Amigurumi toys I made last year and they live on my husband's desk and come out for family photo shoots like this one! :)

P.S. Sorry for the poor colouring in the photos, our little compact camera is having "colour issues" and we are hoping to buy a new DSLR very soon, so stay tuned! Can't wait to start playing with it and taking proper photos!

Monday, 14 May 2012

Made with Love

Now Mother's Day is officially over, I now can share with you some photos of what I made for the mums. I wanted to make a small gift to send to each (as they both live in Tasmania), so I crocheted a couple of bookmarks. They were fiddly as I decided to venture beyond my skills in wool into mercerised cotton. The cotton I used was really fine (ticket weight 40 for anyone out there who wanted to know the type I used), so it was a bit of a challenge to keep it on the hook (size 1.25mm) while trying to chain. I designed these myself and tweaked it as I went along. To go with these I made them each a custom card.


This last photo I had to share, these two cute little swallows have been visiting each day lately, early morning, then disappearing during the day to go about their business and then returning at dusk to perch for half hour or so before flying off to where ever their nest is for the night. They love sitting on the clothes line with their little heads constantly turning, watching the other birds fly about. Also the clothes line is out of reach from the cats so I think they think its a bit of a safe haven to have a break from zooming about the place. Too cute! :)

Friday, 11 May 2012

Image Refresh

Well after a lot of wrestling with Illustrator I have finally got my new logo as I imagined it, to replace the temporary title.  I have also decided to change the name a little, to 'Twig & Tweak' both to be able to use my pretty ampersand, and because I feel that the new name incorporates more of my design ethos: I like to take a small idea, let it flourish and develop, and tweak the design until I'm perfectly happy with it.  My new logo is the perfect example of this, the initial idea was a rough scribble in my notebook, and only after a lot of experimentation and fiddling did I come to the final image which now graces the top of my page.

I also plan to imagine, design and hopefully market some of my creations in the coming year, and wanted a brand that I could carry through from my blog into a potential business. I am excited and very much looking forward to sharing my ideas and designs as I get up and running.

Monday, 19 March 2012

Happy Anniversary!


My husband James and I celebrated our first wedding anniversary last week. When I think about it, I honestly don't know where the time has gone, I'll admit the wedding itself was a bit of a blur after all the build up to the day, yet here we are today a year later.

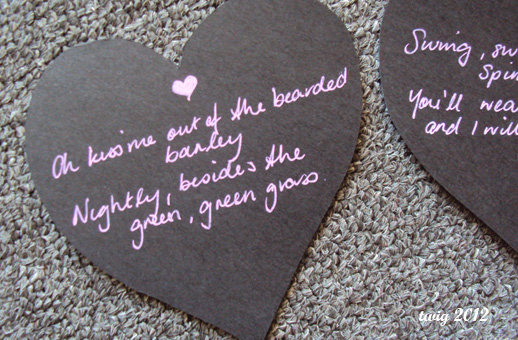
Traditionally the first wedding anniversary is gifted with paper and seeing as I love making anything with paper and card, I set out to make a few paper themed items to give to my dearest! I initially planned to make a "Happy Anniversary" garland but seeing as I didn't really have anywhere to hang it properly, I decided to lay it out on the floor instead. I have oodles of paper and card scraps as I'm one to never throw anything out - yes I'm a little bit of a hoarder - and I always find ways to use them. Fittingly I had some left over invitations from our wedding stationary (printed on gorgeous white luminous card) as well as some black card left over from our friends wedding stationary I made last year. It was perfect to use for the hearts and lettering.


Our logo for our wedding was a seahorse, so I cut out one from the invitations and layered with a '1'. On the reverse of each heart I wrote a couple of lines from the song that we played for our first dance (Kiss Me - Sixpence None the Richer) which surprisingly all fit on, so I keep telling myself it was meant to be!


I also made a 'love box'. I upcycled a black gift box I had in my stash of things which I recovered the lid, added stripes to each side of the box (with more scraps) and I finished the box by attaching a wired ribbon on the lid. Inside were more paper themed items I made; a love letter, quotes, the heart garland and some homemade bath salts. I know technically bath salts do not fit with the paper theme, but we both love a soothing soak in the bath, so I thought it was a nice little addition.


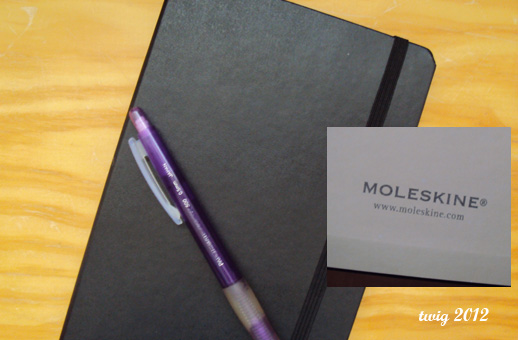
James, in keeping with the paper theme, gave me my first Moleskine! Yes I now can proudly say I have a Moleskine :) I know it's a bit strange in a way seeing that I have many, many sketchbooks in my collection, but I have never owned one until now.  I'll have to make sure that when I draw/write in my Moleskine they are treasured scribbles and doing that it is going to be a challenge in itself!


And to round it off is a photo of me in my new dress before going out to dinner at our favourite Japanese restaurant to celebrate. I bought the dress from Target for $10, a bargain considering the original price tag was $50. My purple leather mary-janes matched perfectly as did my glasses. I stylized the dress with a light cyan ribbon as I didn't have a proper belt to match, it still worked and I liked it so that is all that really matters.

Friday, 28 October 2011

Monte


Meet Monte the monkey! 

Made especially for my dad's birthday, as he has always wanted a monkey of his very own, a somewhat impractical dream. I designed him based on my experience with a few previous Amigurumi; his body and arms are fairly standard, but his curly tail took a bit of fiddling and I especially like the way it turned out. I really wanted to give this monkey a cheeky personality (to match his future owner) so I gave him a contrasting white face and hands for dimension and a wicked little grin.


To go with Monte I also whipped up this matching card showing him swinging around and having fun. The card is constructed in my usual style; I like to draw a couple of rough sketches first to get approximate shape and proportion, then using a scalpel free-cut the shapes out. For this particular card I used both scraps of green patterned fabric and a nice embossed cardstock that gives Monte's body a bit of extra texture and pop. The next step is to build the subject up with a few layers to give depth and draw any extra features, backgrounds etc. Finally some birthday wishes on the inside and it's done.